When you deploy your Spring Boot application to Production environment, you need to monitor how your Spring Boot Application is behaving.
And this is exactly where Spring Boot Actuator comes into picture.
For monitoring your Application, Spring Boot provides something called as Actuator.
Spring Boot Actuator provides us with a couple of endpoints that lets us monitor the Spring Boot application in an effective way.
To use Spring Boot Actuator, the only thing you have to do is, include the dependency for Spring Boot Actuator in pom.xml.
<dependency>
	<groupId>org.springframework.boot</groupId>
	<artifactId>spring-boot-starter-actuator</artifactId>
</dependency>
And you are all set to use Spring Boot Actuator for monitoring your application.
So, along with other dependencies, Spring Boot Actuator looks like,
<?xml version="1.0" encoding="UTF-8"?>
<project xmlns="http://maven.apache.org/POM/4.0.0"
         xmlns:xsi="http://www.w3.org/2001/XMLSchema-instance"
         xsi:schemaLocation="http://maven.apache.org/POM/4.0.0 http://maven.apache.org/xsd/maven-4.0.0.xsd">
    <modelVersion>4.0.0</modelVersion>

    <groupId>org.example</groupId>
    <artifactId>springbootproject</artifactId>
    <version>1.0-SNAPSHOT</version>

    <parent>
        <groupId>org.springframework.boot</groupId>
        <artifactId>spring-boot-starter-parent</artifactId>
        <version>2.4.1</version>
    </parent>

    <dependencies>
        <dependency>
            <groupId>org.springframework.boot</groupId>
            <artifactId>spring-boot-starter-web</artifactId>
        </dependency>

        <dependency>
            <groupId>org.springframework.boot</groupId>
            <artifactId>spring-boot-starter-actuator</artifactId>
        </dependency>

    </dependencies>
</project>
As said above Spring Boot Actuator provides with a list of endpoints to monitor the Spring Boot Application.
Let us take a look at some of the endpoints :
| Endpoint | Description |
|---|---|
| /health | Shows the overall health of our application. |
| /info | Shows the information about the application. |
| /loggers | Shows the logging information. |
| /auditevents | It displays audit related information like login or logout. |
| /threaddump | Shows the thread information of the JVM. |
| /beans | It displays all the active beans in Spring bean factory. |
| /metrics | Shows the detailed metrics of the Spring Boot application. |
| /shutdown | Does a graceful shutdown of the Spring Boot application. |
| /sessions | Shows all the HTTP sessions when we are using Spring Session. |
| /logfile | Shows the application logs. |
So in our application.properties file, let us enable the health, info, loggers, metrics and beans.
To do that, we have to mention them(i.e. health, info, loggers, metrics and beans) in the management.endpoints.web.exposure.include property.
And set management.endpoint.health.show-details to always to get the details of all the actuator endpoints.
management.endpoints.web.exposure.include=health,info,loggers,metrics,beans
management.endpoint.health.show-details=always

Now, we are all set to consume the health, info, loggers, metrics and beans endpoints.
Let us start our Spring Boot application first.
Then let us hit the actuator endpoint.
localhost:8080/actuator
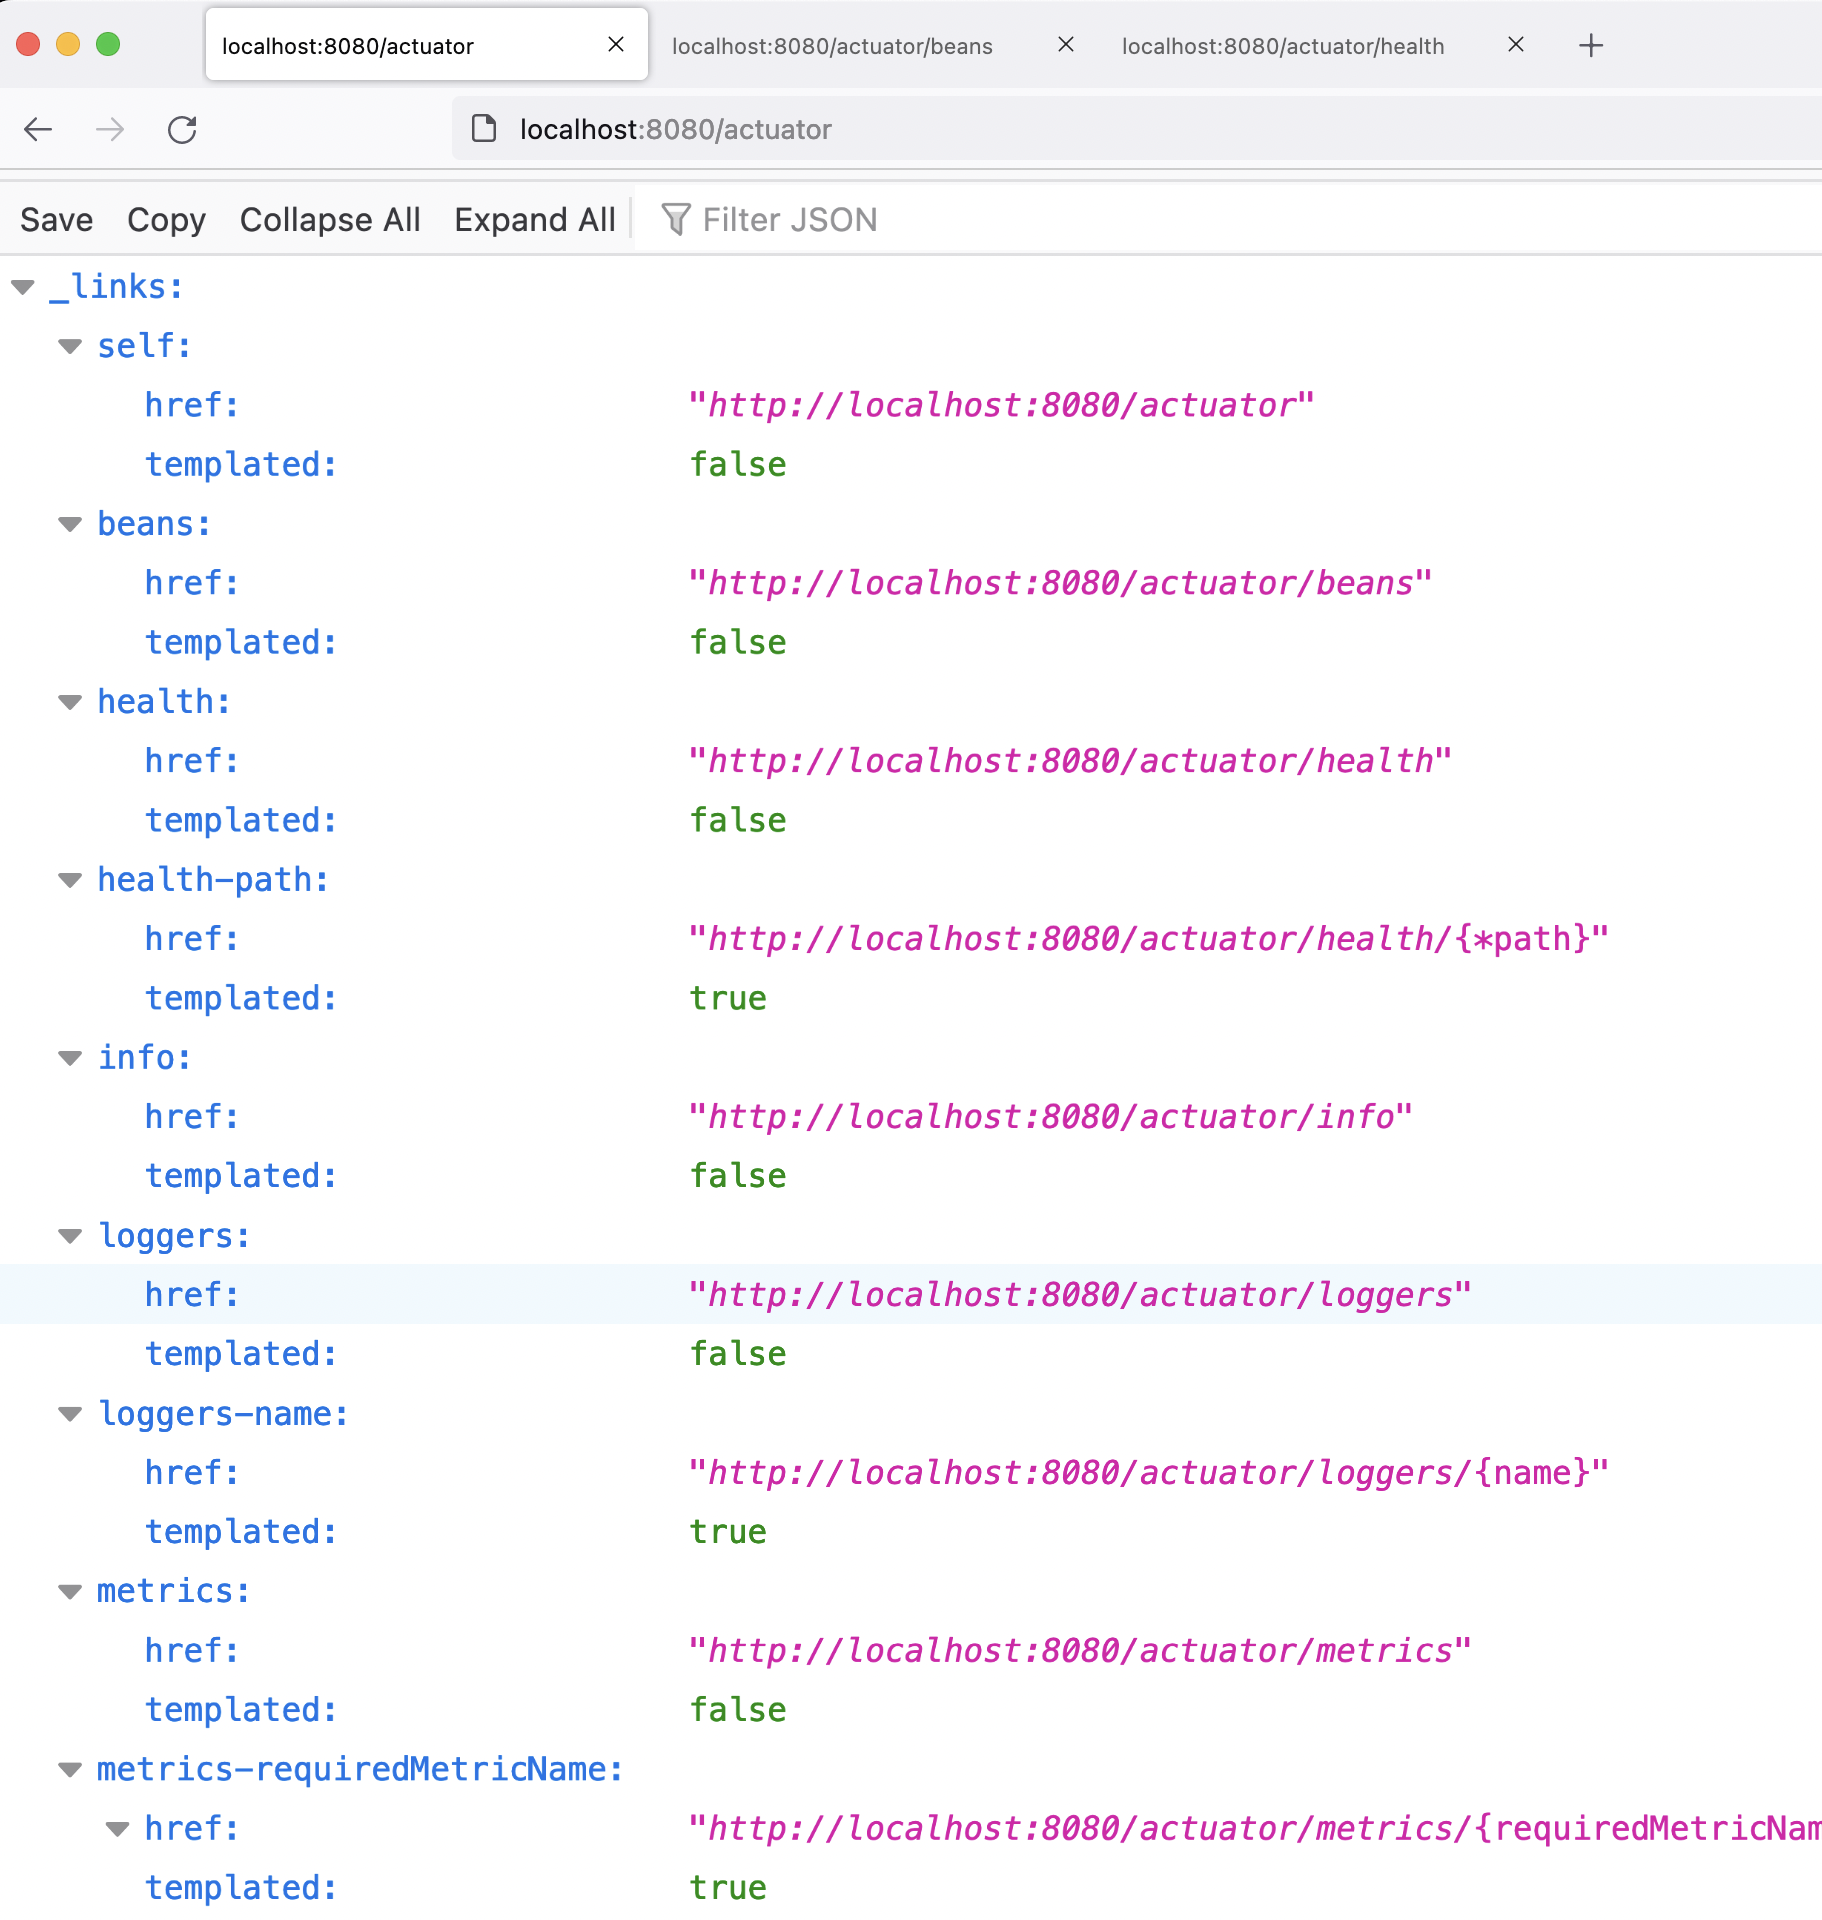
Here you can see the list of all the endpoints.
Let us select the /health endpoint.
localhost:8080/actuator/health
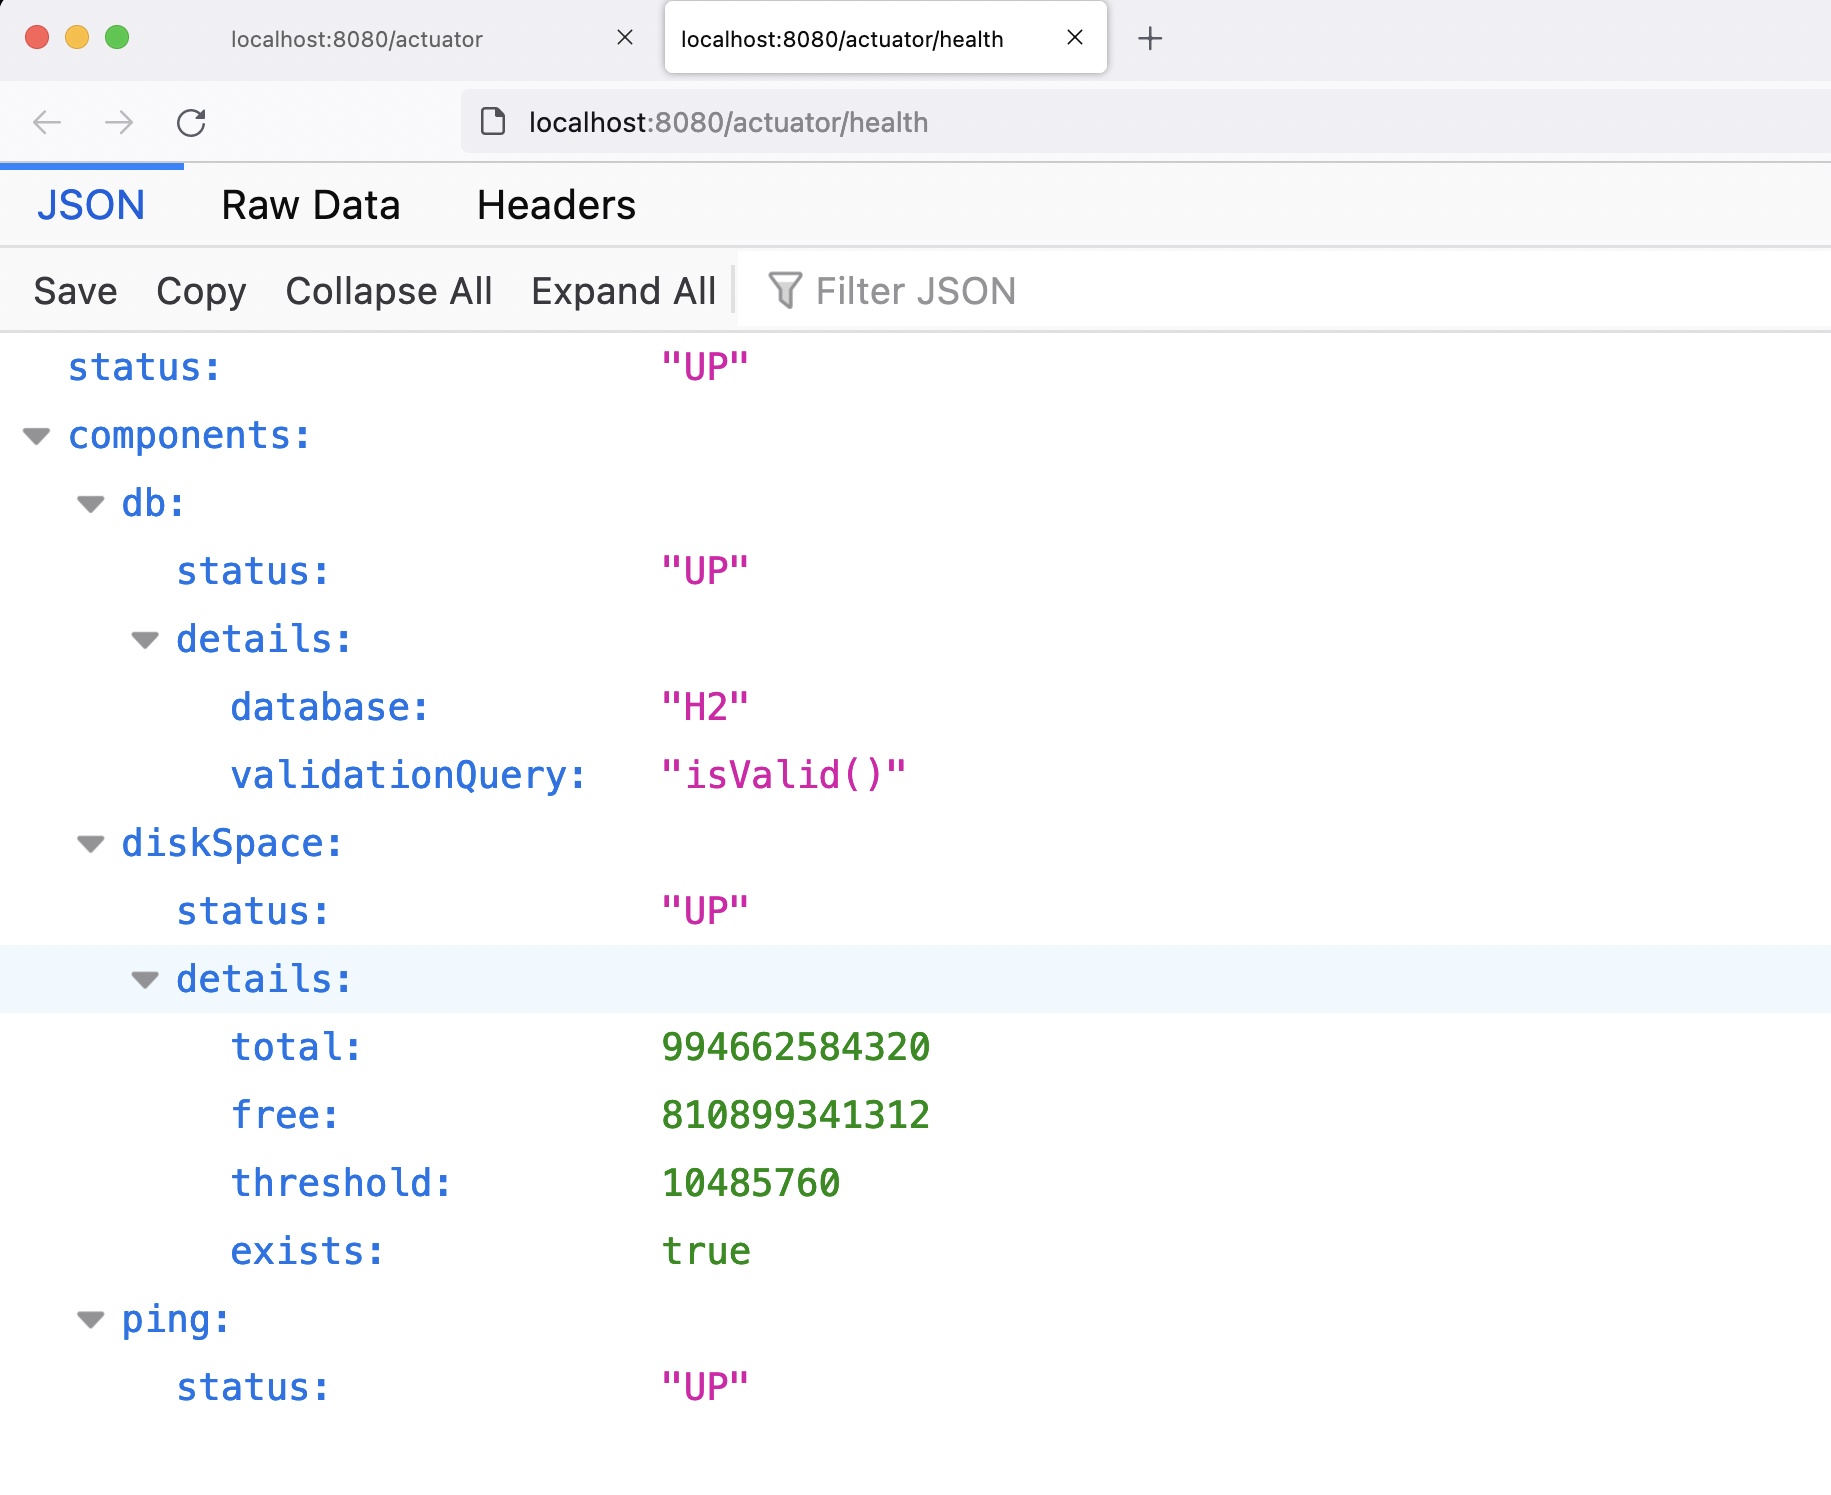
The spring boot actuator health endpoint shows the details of the health status of the Spring Boot Application.
The health status is UP. And also if you remember, in one of the tutorials, we have connected to the H2 database. The details of the H2 database is also shown.
So, using spring boot actuator endpoints, we were able to manage the Spring Boot Application in a more effective way.